There are two different options for receiving payments within Unified Practice. To Receive a Payment through Patient File or Receiving a Payment from the Calendar > Appointment Details Screen
To Receive a Payment through Patient File:
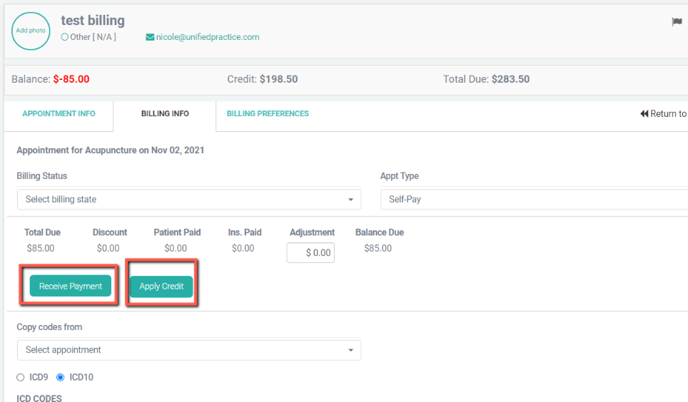
- First, navigate to the Patient File.
- Click the Date of Service you will be receiving a payment for. This will bring you into the Billing Info Page. Enter any CPT codes, ICD codes, or non-billable items for this date of service. Be sure to click save once these charges are entered. These charges may also be entered on the EHR for iPad charting app in the SOAP notes for the date of service.
- Then, scroll to the top of the page. You will see "Receive Payment" or "Apply Credit" if the patient has credit available to use in their account. Click "Receive Payment" to take a new payment for that specific date. "Apply Credit" is used for prepayments or packages that have already been purchased and charged.
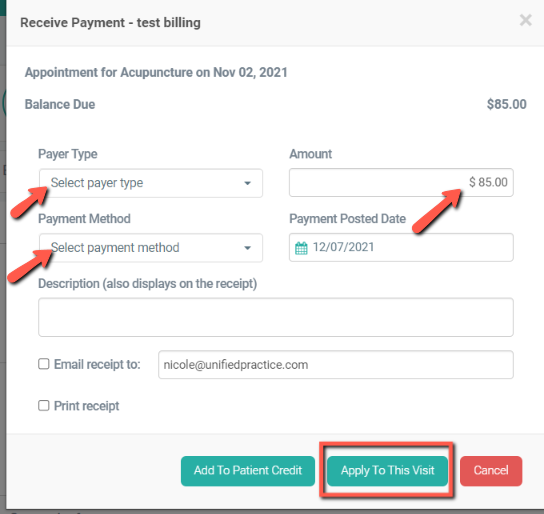
- Once "Receive Payment" is chosen, choose the Payer Type, enter the amount due, and choose the Payment Method. Here you can also add a description that will appear on the patient receipt.
- Then, click "Apply To This Visit".
- Once "Apply To This Visit" is clicked, a separate dropdown menu will appear. This is where you will allocate and enter the amount of money due to either Services, Products, or both. In this example the entirety of the payment will be allocated towards Service.
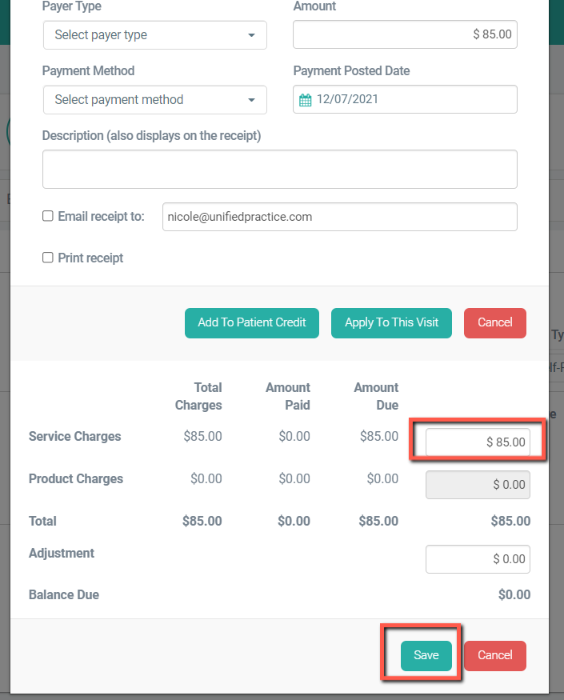
- Lastly, click Save. If you have an integrated Credit Card Processor there will be no additional steps needed. If you use an external Credit Card Processor, make sure you are also charging the card through your Processing system.
A signature line will be included on the receipt for Credit Card Transactions.
Receiving a Payment from the Calendar > Appointment Details Screen:
This Feature is currently for Self-Pay Patients only.
- First, navigate to the Calendar and click on the Patients Appointment you would like to take payment
- You will see 2 tabs within the box. Appointment Details and Billing Info

- Within the Appointment Details tab, you are able to click the Manage Appointment Billing
- This will take you to the Billing Info page within the Patient File to Receive Payment(Insurance or Self-Pay Patients)
The other option will be to click on the Billing Info Tab: - From here you are able to Receive Payment for all Self-Pay Patients or Send Payment Link via email or SMS or both
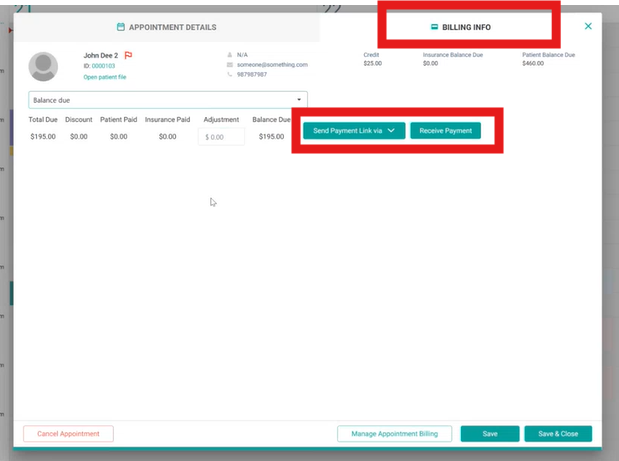
- Once Receive Payment is clicked you are able to take payment for the services rendered right from here.
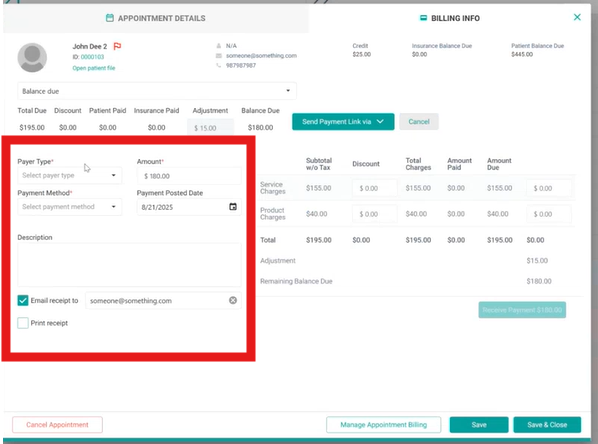
- The Payer Type will only allow for Patient, the Amount Due will automatically populate, choose the Payment Method, posted Date and Details if needed
- Last, click the green Receive Payment button. The Payment will be allocated to the Date of Service.