![513x513px Logo (1)-1.png]](https://5965487.fs1.hubspotusercontent-na1.net/hub/5965487/hubfs/513x513px%20Logo%20(1)-1.png?height=40&name=513x513px%20Logo%20(1)-1.png)
Important: Before billing on the iPad, make sure an Associated Fee Schedule is set up for the service. This allows the Balance Due to automatically populate for the appointment. [Learn how to create an Associated Fee Schedule].
Step 1: Open the Billing Info tab
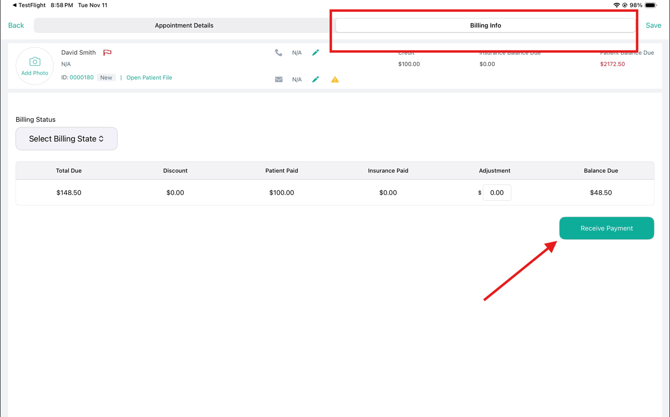
From the appointment, tap Billing Info, then tap Receive Payment.
Step 2: Review the billing details
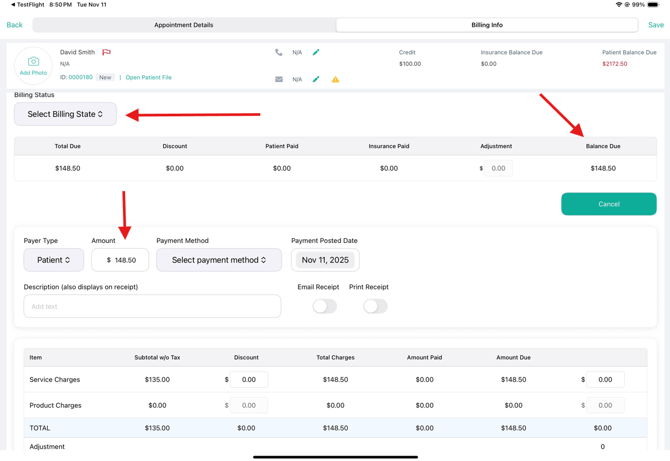
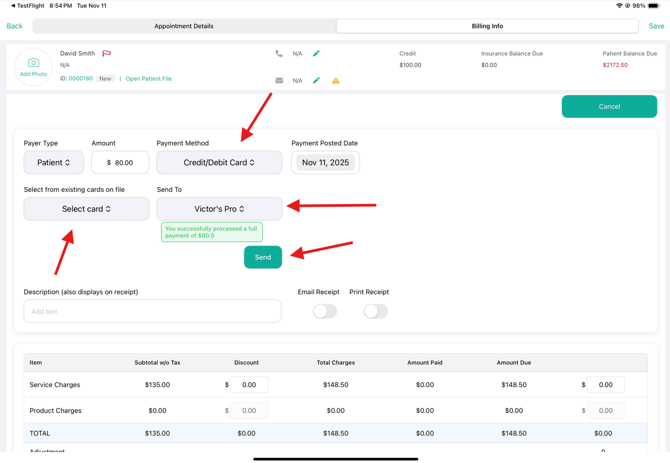
Review the Balance Due and enter the amount you would like to collect from the patient. You can also update the Billing Status or make any discounts, if needed.
Important: At this time, Payer Type must be set to Patient when receiving a payment on the iPad. Insurance payments cannot be applied on the iPad. To apply an insurance payment to a date of service, log in to Unified Practice from a web browser.
Step 3: Select the payment method
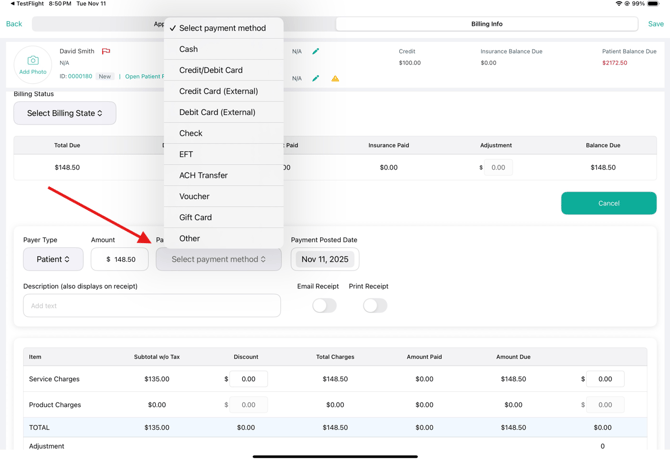
If you are using UnifiedPay, select Credit/Debit Card.
- If you have a UnifiedPay terminal, select the appropriate device from the Send To dropdown and tap Send.
Step 4: Apply the payment to the Date of Service
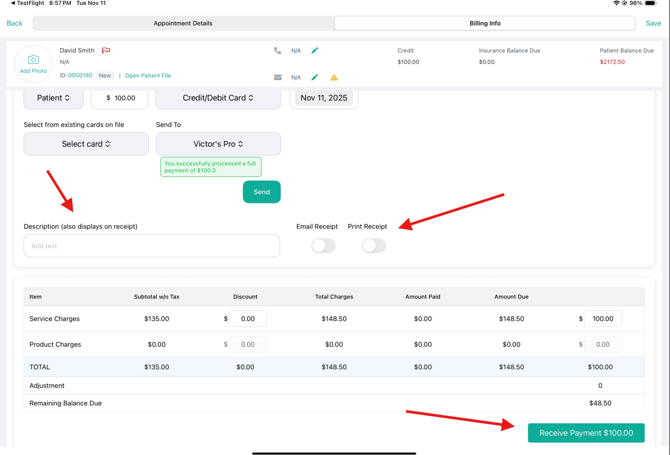
Once the payment has been successfully processed, you can add a Payment Description and select your receipt preferences, if needed.
Enter the payment amount under the applicable Service Charges and/or Product Charges, then tap Receive Payment $X to apply the payment to the date of service.