Jump to:
- Scheduling a Patient
- Viewing the Calendar
- Cancel an Appointment
- Editing Appointments
- Creating a Time-Off Event
- Calendar Filters
Scheduling A Patient:
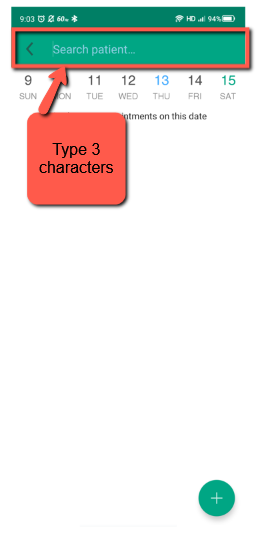
- To search for a patient, go to the Side Menu and tap "Search Patient". A search field will open where you can search for the patient by typing a minimum of 3 characters.

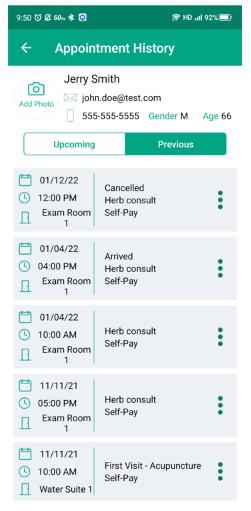
- Click on the patient name from the search result drop down to display the Patient File. Click on "Upcoming" or "Previous" to view the patient's appointment history - future and past. Appointments can only be viewed, not edited, from this view. You cannot update patient information from this screen.
Please note: To update patient info, you will need to log into the web platform and make any edits necessary.
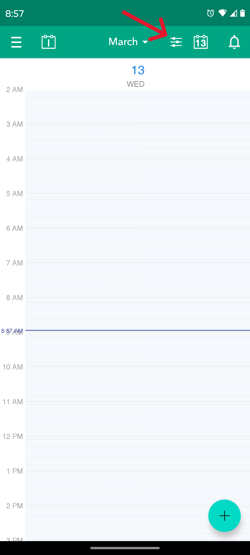
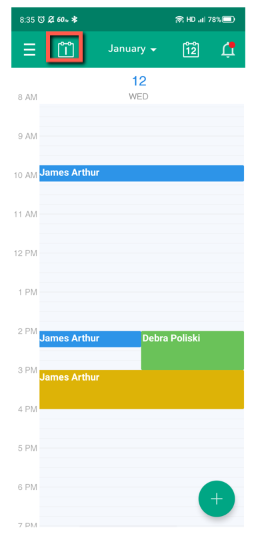
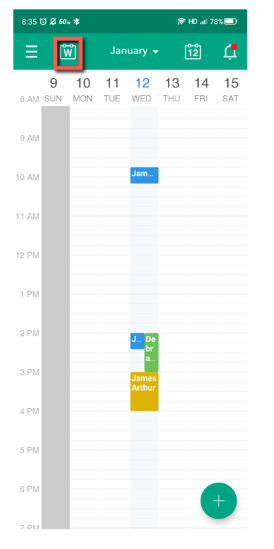
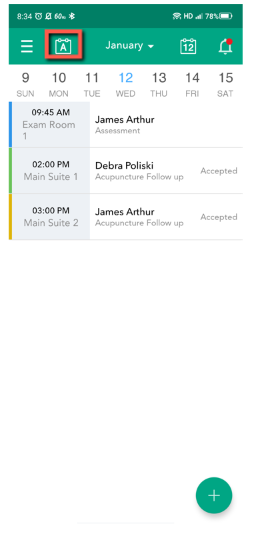
Viewing the Calendar:
- You can view your calendar by Agenda, Daily, 3 Day or Weekly view. Simply click on the calendar icon at the top left of your screen and select your viewing preferences.
- These views offer quick access of the current day and open a full calendar view as a pop-up.
- If you tap the date icon in the top right corner, you will be able to change the date you are viewing.
- If you tap the arrow pointing down next to month, you can choose a different month to view.
Creating an Appointment:
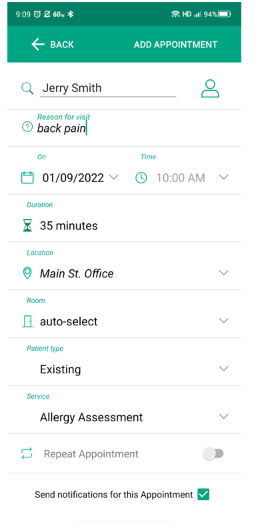
- To create a new appointment, click the plus sign icon found on the right bottom corner and select "Add Appointment". From there, you can Add Patient, Search for Existing , or Create New.
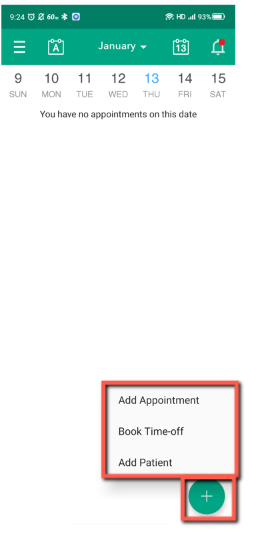
- The screen below shows how an appointment can be created by clicking on the "Add Appointment" button. Be sure to fill in each mandatory field in order to save the appointment. Leaving mandatory fields black will result in no appointment being saved.
Editing Appointments:
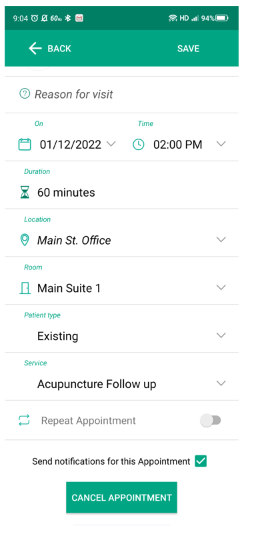
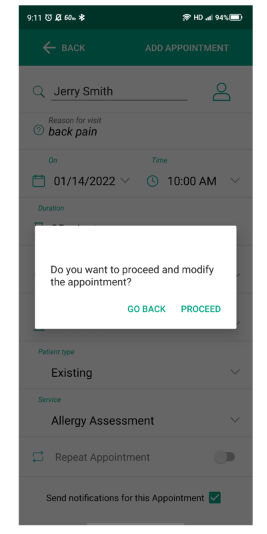
- To edit an appointment tap directly on the appointment (you can do this in any calendar view).
- To edit the details of the appointment, tap Edit and then update the appointment details. To save the edits you will need to tap Save.
Cancel an Appointment:
- If an appointment does not have Card Capture for Policy Enforcement turned on, or if the appointment is outside of your set cancellation window, the appointment can be cancelled from the Edit appointment screen. Simply tap the "Cancel Appointment" button to cancel the appointment and you will receive a confirmation message for the cancelled appointment.
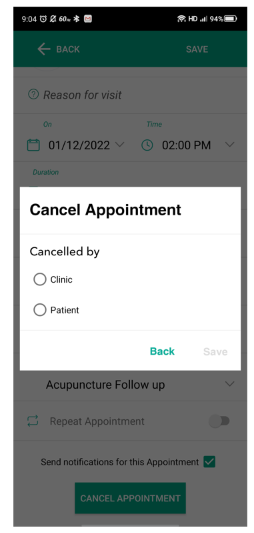
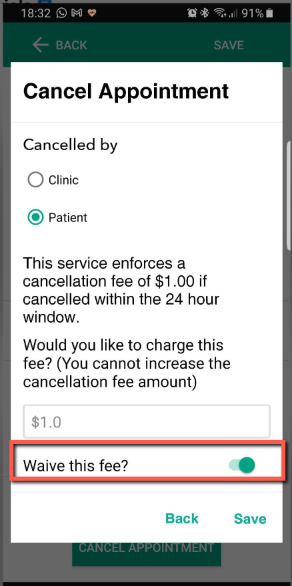
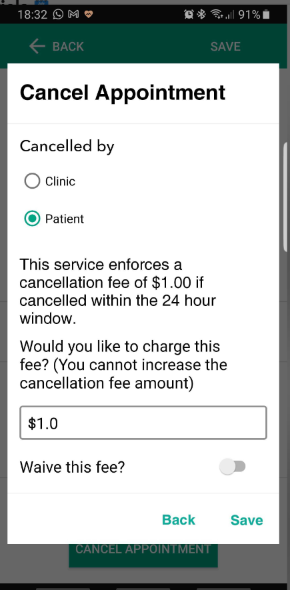
- If the appointment is cancelled within your Cancellation Window the whatever fee you have associated with your cancellation policy will be incurred. You have the option to waive the free from this screen by turning the "Waive Fee" toggle to "on" If you want to enforce the cancellation fee, leave the toggle off.
Creating A Time-Off Event:
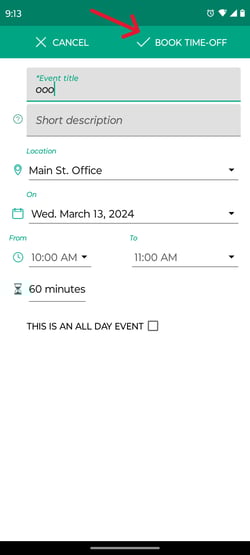
- Time off events can be created from the app by tapping on the Plus icon in any of the calendar views.

- Enter the details for your Book Time-Off event and tap the Checkmark to create.
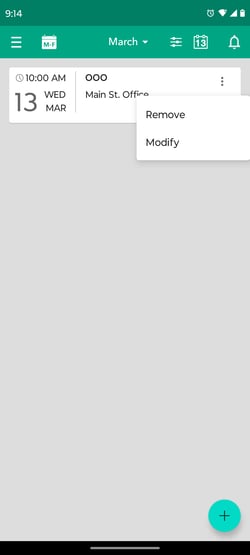
- If you need to modify your Book Time-Off event, click the event to go into the Event Details.
- Tap Remove or Modify to update the Book Time-Off event.
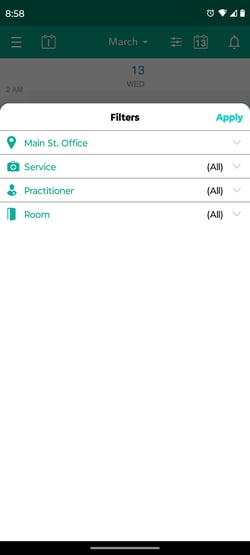
Calendar Filters
- To use the Calendar Filters click on the Filters icon in the top right of the screen.
- Filters can be set by Location, Service, Practitioner and Room. Click Apply to update calendar filter preferences.